- November 30, 2018
- Posted by: Orin Swanston
- Categories: eCommerce, Woocommerce

The Woocommerce API is a powerful & flexible way to interact with a Woocommerce store, allowing developers access to create or update data within the store such as products and orders.
To get started, you’ll need to first generate API keys while logged into your Woocommerce dashboard.
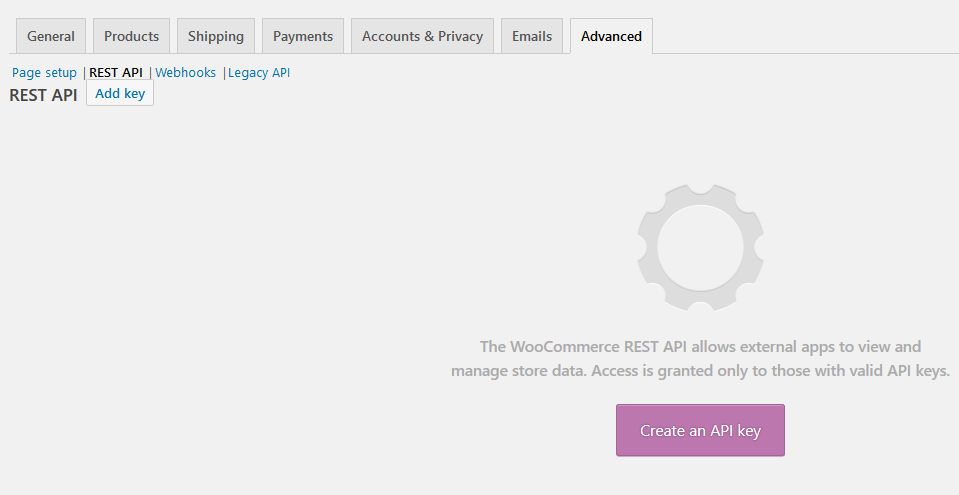
First head to Woocommerce > Settings > Advanced, then go to the REST API tab and click on Add key.
Add a description for the key for your own reference. Now choose a user that has access to the admin area of your Woocommerce store give them read, write or read/write access depending on how you will be using the API. Finally, click on Generate API key.
Your keys should now be displayed but don’t close the tab yet. Make sure you copy both the Consumer key and Consumer secrets somewhere safe, as both will be needed to make calls to the API.
There are several wrappers for the Woocommerce API but for this tutorial we’ll be using the PHP wrapper. If you have the composer PHP package manager already installed then you can grab a copy of the wrapper by running the following line inside your project folder using a terminal or command prompt.
composer require automattic/woocommerce
Otherwise you’ll need to download and install it before continuing.
Create an index.php file and insert the following code
$autoloader = dirname( __FILE__ ) . '/vendor/autoload.php';
if ( is_readable( $autoloader ) ) {
	require_once $autoloader;
}

use Automattic\WooCommerce\Client;

$woocommerce = new Client(
	'your website url',
	'your consumer key',
	'your consumer secret',
	[
		'wp_api'  => true,
		'version' => 'wc/v2',
	]
);
First we initialize the our Woocommerce client settings. Enter your website url, and the consumer key and secret that you would have previously created as shown above. Now let’s try adding a product.
$data = [
            'name' => 'My Product Name',
            'type' => 'simple',
            'regular_price' => 30.50,
            'sale_price' => 28.50,
            'description' => 'My long product description goes here',
            'short_description' => 'My short description goes here',
            'categories' => [
                [
                    'id' => 10
                ]

            ],
            'images' => [
                [
                    'src' => 'url to where my product image is located',
                    'position' => 0
                ]
            ]
        ];
Next we create our data object and populate it with the data that our product will have. If you know the category that you want the product to be in, then you can go ahead and add you category id. You can also import an image by specifying the url where the image is located. These could be links hosted for example in Dropbox or Google drive.
Finally let’s insert the actual product.
try {
    print_r($woocommerce->post('products', $data));
}
catch(Exception $e) {
    print_r($e);
}
And that’s it! You can quickly see how this can be further extended by adding some additional code to loop through a spreadsheet or a separate database to import multiple products.
Next time, well take a look at how to import data from a spreadsheet. Stay tuned!